
Introduction
Small cracks in the plaster often occur in various places. Sometimes, they appear due to house settling, sometimes – due to the movement of materials or their destruction, and sometimes – for no particular reason. Whatever the reason, most often, these cracks can be easily fixed with a few simple actions. Nevertheless, before fixing, it is worth taking a closer look at the crack to understand its cause and whether there are any accompanying effects.
Cracks in the plaster are a relatively simple problem to fix since they can be solved with the tools at hand and do not require extensive experience in repairs. However, in order to properly fix the crack, it is necessary to study it and get to the bottom of the reason for its formation. In addition, when choosing the material to fill the crack, it is necessary to take into account the type of material of which the walls are made. Thus, for concrete, brick, plaster or gypsum plaster, special mixtures are required. All this is necessary so that the repaired place does not call for revision again in the future and is invisible after a few days.
The preparation stage is often the most time-consuming one, but it is also the most critical. Before filling the crack, it must be cleaned of all debris and old plaster and painted material. It is important to take care of the floor around the walls so that it does not get filled with powder during the repair. In addition, it is necessary to be especially careful at the stage of filling cracks not to take the process too quickly. By using a fast filler, you may not get the desired result. Thus, the main rule in this process is to carefully treat the defect instead of trying to fill it all at once.
Unfortunately, not all cracks can be fixed at home. Large cracks that seem to be growing every day, longitudinal cracks, and cracks with a noticeable gap between the walls are examples of such cases. In addition, it is necessary to call an expert in those situations where the cracks turn out to be grouped, one crack turns out to be connected with another. Moreover, if the cracks are accompanied by other effects – sagging doors, uneven floor, water leaks, or drafts, this also indicates a more serious problem than just the formation of local cracks.
In this guide, you will learn how to repair small household cracks correctly. If you want the wall to look neat and tidy, you need to invest time and effort in the repair. However, all the complicated steps in this process imply working only with special tools and high-quality materials.
Types of Cracks
To be able to fix a wall crack efficiently, you need to know which type of crack you have to deal with. Each kind of crack is related to a certain kind of problem. It can help you to figure out whether you have to do something with a crack or if it is simply a cosmetic problem. One of the most frequent types of cracks are hairline cracks. As a rule, they look like very thin lines on painted walls, plaster, or drywall. They can appear as a result of natural drying, shrinking, settling, or changing temperature and humidity. Usually, such cracks can be fixed with proper filling.
Another common kind of cracks is a vertical crack. If you see a narrow vertical crack and it does not change in size, then it is probably connected with the normal settling process or changes in the material. But if your crack changes in size or grows, then simply covering it with a filler will be an inappropriate way of fixing. Horizontal cracks can be more problematic because of their nature. Sometimes they can be wide or growing. Moreover, in some cases, a crack can appear along with bulging or moving of the wall. You should be aware that such cracks can be related to certain pressure or structural movement.
Also, diagonal cracks can appear near doors, windows, or corners of walls. Some small diagonal cracks can appear because of natural movement or stressing of this area, but large or constantly appearing cracks need to be inspected. Cracks, which appear near the places where two different materials are located, can be the result of expanding and contracting of these materials with different speeds. In this case, it can be necessary to use flexible repair materials.
But you have to keep in mind that there are cracks caused by water damage and ordinary surface cracks. Moisture can weaken the plaster, drywall, paint, and other wall materials; thus, it causes cracking, staining, bubbling, or peeling of the surface. In this case, it will be inefficient to fill a crack. First of all, you need to find the source of the problem and eliminate it.
Before beginning a repair, try to inspect a crack and see whether it changes in size or appearance. Pay attention to its width, direction, location, and whether the nearby surfaces are damaged or not.
Causes
There are several causes that could lead to the formation of wall cracks. It is crucial to figure out what caused the formation of wall cracks before starting any repairs. First of all, such cracks might appear due to the natural settling of a house. Since all building materials tend to settle down with time, the house structure undergoes certain changes leading to the creation of small hairline cracks in plaster, drywall, or other wall materials. In most cases, such cracks are minor if they are stable and there are no other changes happening along with their development.
Temperature and humidity changes might lead to the appearance of cracks. All building materials are capable of expanding and contracting depending on environmental conditions. When there is hot weather or cold weather or some changes in humidity, drywall, plaster, wood frame, and other materials might move a little leading to small cracks forming especially in the areas around joints, corners, windows, or doors.
Poor application or aging of finishing materials might cause cracks as well. Such surface materials as plaster, joint compound, paint, and others might shrink in case they dried up incorrectly. In case if the finishing materials were applied in excess or improperly, cracks might appear later. Sometimes poorly finished and loose joints of drywall panels might show up in case of painting.
Wall cracking might be also caused by moisture. In case if the wall is damaged due to the leaking of pipes, roofs, windows, bathroom, or any other parts of the building, wall cracks might appear along with other types of damage such as staining, bubbling, or peeling. In case moisture is the reason for such damage, it is impossible to solve the problem by filling the cracks. It is necessary to eliminate the source of water in order to make repairs possible.
Materials Needed
Fixing the small crack in a wall typically does not entail gathering a lot of tools and materials as well as buying a lot of equipment that will cost much. Being prepared with the proper materials beforehand can ease the repairing process and increase its efficiency significantly. Depending on what type of material was used for a wall, the materials needed may change. Therefore, it is advisable to select appropriate repair materials for the particular wall to achieve the best result.
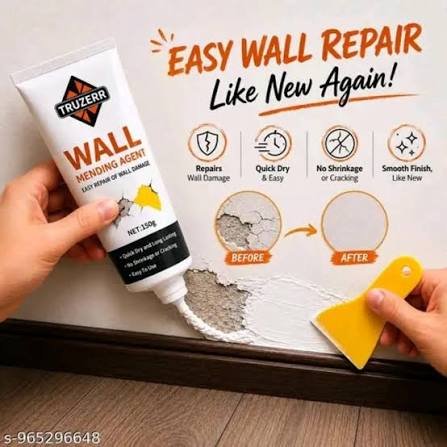
First, one needs to select an appropriate wall filler or spackling compound. They serve the purpose of filling cracks or other defects on a surface and making a smooth surface that can be sanded and painted. In case the wall has very small hairline cracks, one may use light filler; somewhat bigger cracks should be filled with a suitable joint compound or repair product. Follow the instructions given by the producer regarding application and drying of the product.
Another useful instrument to be used is a putty knife or filling knife that will help to spread the repair product smoothly on a wall. One may also need a utility knife or a similar instrument that will help him to carefully cut the loose material near the crack before filling it with the repair product. After the drying of the filler, one will need some sandpaper or a sanding sponge to sand the wall surface. To smoothen the repaired part and to make it look as though there were no crack on the wall at all, one will need some fine-grain sandpaper.
Cleaning the Crack
Cleaning of the damaged part of the wall is a necessary preliminary step before the actual filling of the crack. Preparation will help the filler adhere better to the surface and make the repair more durable and neat. Firstly, one needs to look at the crack thoroughly and check whether it has any loose paint, plaster or drywall, dust or other particles around it. All loose elements have to be carefully scraped away leaving only the firm part of the surface intact.
If one is working with a very small crack, it is possible to clean the surface dust with a dry brush or soft cloth. In case the crack has some loose particles, it is also possible to use a utility knife or a similar scraper to clean or widen the edges of the crack. However, one shouldn’t remove too much wall substance from the surface, since the goal is to get a clean surface for better adhesion of the filler. It is important to do this slowly and carefully in order not to damage the rest of the wall surface.
After the removal of loose elements, one can wipe the area with a slightly wet cloth if this is suitable for the specific wall surface. One shouldn’t forget to let the wall dry completely before applying the filler. Some repair products cannot be applied to moist surfaces and may not dry properly in case there was moisture around the crack. In case one sees the water stains, dampness, mold or a leak, one should take care of this problem before proceeding with the cosmetic repair procedure.
It is also recommended to protect the floor and furniture near the wall from dust created while cleaning or sanding the crack. One can use the drop cloth or protective sheet, which will ease the process of cleaning. One should put on safety glasses and dust mask when scraping and sanding the material, which creates fine dust.
After all these procedures are performed, the crack should be inspected again and cleaned of any loose particles and unstable edges. Cleaning of the crack seems to be a rather insignificant procedure, but it will provide a good surface for repair compound application.
Applying Filler
Once the wall crack has been cleaned and prepared, one needs to apply a proper filler or spackle. This substance will help fill up the crack and provide a smooth surface, which will be further sanded and painted. When applying a filler, make sure that the wall is thoroughly dried and that a repair product that is appropriate for a particular wall and a particular crack has been chosen. In any case, read the instructions on the product carefully, as the drying time and the method of application may differ significantly from one another.
Take some of the filler in a clean putty knife and carefully apply it into the crack, instead of applying on its surface only. This will allow getting rid of possible voids under the repair product. After the filler has been applied, one should use the flat side of the putty knife to spread the excess filler on the wall around the crack. One should try to get a flat surface without any thick layers of the filler.
If one deals with a deep crack, it is better to use several thin layers of filler instead of filling the damaged place all at once with a thick layer. Each layer should be applied after the previous one has dried according to the manufacturer’s instructions. Otherwise, shrinkage, unevenness, or cracks in the filler may appear as it dries.
After applying the last layer, one should carefully level the filler with the help of the putty knife. It does not matter if the repair does not look like other parts of the wall at the moment, as after drying, the filler can be sanded.
When applying the filler, keep the work area clean and avoid touching the repaired place before it dries completely. If the crack is big, keeps reappearing, and it looks like the cause of its appearing is the moisture or moving walls, it is not recommended to fill it only. One should investigate the reason of it first.
In general, using the filler, one can repair small surface cracks.
Sanding & Painting
After the filler dries, one needs to sand and paint the repaired area. Such an operation is crucial since it helps to blend the repair with the adjacent wall surface. It is important to check the filling material manual to make sure that the filler has completely dried out since premature sanding may harm it and provide an irregular surface.
Use a fine-grit sandpaper or a sanding sponge to smooth the repaired area. Be gentle while doing it since excessive force will lead to removal of extra amount of filler or damage to the neighboring painted wall. Rub the sandpaper on the wall surface until you feel its smoothness when touching it by your hand or see any bumps, dips, or edges remaining. If the surface appears uneven, use a small amount of filler, dry it out and sand again.
It is crucial to wear safety glasses and a dust mask since sanding causes fine dust. It can harm your eyes and lungs. To protect other surfaces in the room, use a proper cover since sanding creates dust. After you finish sanding, remove all the dust from the surface using a dry cloth or brush. The surface should be clean since the dust can negatively affect the process of paint application and cause an uneven result.
Depending on the repair type and type of wall paint, it may be useful to apply the suitable primer to the repaired area. Wait until it dries out and paint using a brush or a roller. Try to imitate the color and texture of the neighboring surface by using the same color of paint. Apply thin layers instead of a thick one.
Allow each layer to dry and determine if another layer is required. When the last layer dries, check how the repaired area looks like under the normal lighting conditions. If you cannot notice the repair anymore, then you have successfully fixed the wall crack problem.
When to Get Professional Help
While most of the refrigerator efficiency issues can be addressed through maintenance, certain complications will require the services of a qualified professional. Repairing electrical or mechanical parts on your own will only make things worse or pose a potential safety hazard. Your refrigerator might be having a malfunction in the inner components which cannot be detected with temperature settings, the state of the door seal, airflow, and ventilation and will require a professional diagnosis. Any kind of noises, including constant clicking, buzzing, or grinding should prompt you to call a professional.
If your refrigerator is operating continuously but still does not reach the required temperature, it will need professional examination. The continuous operation of the appliance will likely mean that it consumes extra electricity and may have a malfunctioning thermostat, condenser system, airflow, or refrigerant. Also, any water leakage, especially when its source cannot be identified, should be inspected and repaired by professionals. Similarly, a considerable amount of ice formed in the freezer compartment might not necessarily be a sign of an insufficient maintenance; the problem may be with the defrost system.
Any signs of electrical malfunctions are very dangerous and should be attended to immediately. Damaged power cords, burning smell, sparks, unusual overheating near the plug, and frequent trips should signal you that you should stop using the refrigerator and contact a professional service. Never try to open and fix anything related to electricity.
Additionally, professional maintenance might be a solution for old appliances which have become inefficient. A professional service can examine the components of your appliance, detect and solve problems and see if the repair is worth it. Acting early can help you avoid bigger repairs. Follow the manufacturers’ advice and contact the appropriate professionals.
Here’s another article you may find useful:
7 Easy DIY Home Projects for Beginners
Electrical Safety: 7 Common Mistakes to Avoid at Home
Home Safety: 9 Essential Tips Every Family Should Know
9 Common Home Maintenance Problems and Their Solutions
Conclusion
Making the refrigerator more effective does not necessarily involve the acquisition of expensive equipment, as well as replacement of the current appliance with a new model. The following tips will help to increase effectiveness of the refrigerator use without unnecessary consumption of energy resources. Maintaining proper temperature inside the refrigerator, minimization of opening the door often, and checking that the door closes properly are among the most common means to achieve higher effectiveness. In addition, having a proper door seal is crucial since damaged or loose sealings will contribute to leaking of cold air and extra work on the refrigerator.
Organizational tips will help to increase efficiency of the refrigerator as well. Try to avoid filling the refrigerator with too many goods since in such a case air vents will be blocked. Besides, the presence of organizational structure will help you to avoid prolonged keeping of the door opened. Cooling down of hot food products before storing them into the refrigerator will minimize the work needed to keep the temperature of air constant.
Proper maintenance is one of the most important means to ensure good performance of the refrigerator. Regular cleaning of condenser coils, maintaining proper ventilation conditions, removal of expired food products, and checking for unusual noises or changes in temperature of the air inside the refrigerator can be mentioned as well. If the refrigerator operates all the time, stops cooling down food products, starts to leak water, and shows any other signs of problems, it is better to seek professional help.
In this way, it is easy to ensure good performance of the refrigerator and avoid unnecessary expenses on electricity and repair works.



Pingback: 9 Common Home Maintenance Problems and Their Solutions - hometipsy.com