
Introduction
There are many conveniences in our lives, which we can use when cooking different dishes. One of them is the microwave oven. It allows heating different meals, preparing snacks and drinks very quickly. However, the appliance may be spoiled after intensive work due to the appearance of spots, grease stains, crumbled food and odor. Therefore, if this dirt remains on the walls of the device without timely cleaning, it will dry out and become difficult to clean it. Such a situation negatively impacts not only the visual state of the device but also may spoil the taste of heated meals.
Fortunately, the microwave cleaning procedure is easy and simple, and does not require the application of any cleaning chemicals. With warm water, a soft cloth and some household substances like lemon juice or white vinegar, it is possible to clean almost all parts of the interior of the appliance. Moreover, steam is very useful when cleaning a microwave since it softens the dried food and makes it possible to remove difficult spots. The turntable and other removable parts can be washed in water with dish soap separately.
Regular cleaning is highly recommended since it prevents food accumulation and appearance of bad smells. It should be noted that you should not use aggressive chemicals, rough materials or large amounts of water for cleaning since it may cause irreversible damage to the device. This guide will tell you how to properly clean your microwave, how to get rid of spots and odors effectively and safely.
Why Cleaning Matters
It is crucial to regularly clean your microwave oven because it ensures hygiene in the kitchen, freshness, and cleanliness. During its everyday operation, some tiny portions of food, oil, sauces, and liquids may be spattered inside it. If this problem is not solved, then there will be dried pieces that may become difficult to wash away. Also, accumulated food will form unpleasant odors, which can stay in the microwave oven and spoil the smell of newly heated food.
Cleaning helps to avoid accumulation of food pieces that can stick in the corners, on the turntable, and even on the door of the microwave. A clean interior allows noticing new stains and getting rid of them immediately. It may help to preserve the condition of the appliance and make using it more pleasant.
Also, one of the reasons why it is important to clean your microwave is the appearance of it. An appliance, covered in dried food and grease, will spoil the view of the kitchen, which you have spent many hours tidying up. Luckily, you do not need to invest much time in the cleaning of your microwave.
Steam Cleaning
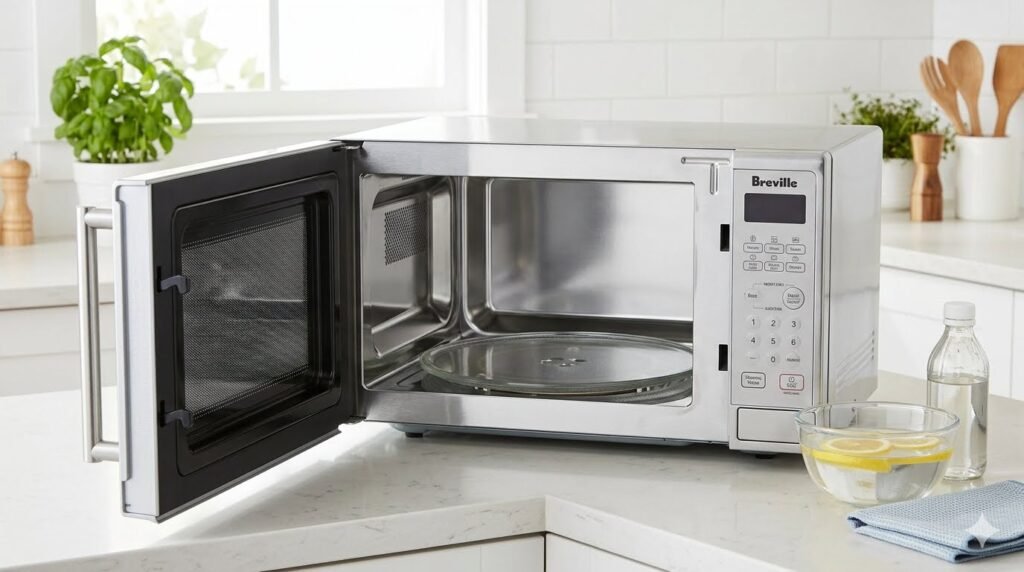
Steam cleaning is among the simplest and most efficient methods of cleaning the interior of a microwave oven. It involves generating moisture and heat, which loosen the dried food particles, grease, and other substances that adhere to the inner walls of the appliance. Notably, one does not require any special tools to perform this task. All that is required is a microwave-safe bowl, water, and either lemon juice or white vinegar.
The first step towards a steam-cleaned oven is to ensure that the chosen bowl is safe for use in a microwave. Then, the next procedure is to add a cup of water and a few tablespoons of either lemon juice or white vinegar to the bowl. Afterward, one should place the mixture inside the oven and heat it in the appliance for a few minutes. It is advisable to allow the heated mixture to sit in the closed microwave for five minutes after turning off the appliance.
Afterward, the hot bowl should be removed from the oven using oven gloves or a thick cloth. The next step is to wipe the interior of the oven with a clean and soft cloth or sponge, starting from the top and the sides and working down to the bottom. At this point, most of the stains in the oven should come off with ease, and those that remain are loosened from the inner walls of the appliance. Therefore, one should avoid using abrasive cleaning agents and prefer to steam clean the oven again instead. Finally, one should use a clean and damp cloth to wipe the oven’s interior and allow it to dry with the door open.
Removing Grease
The problem of grease in the microwave can emerge rapidly, particularly if you heat foods that have oil, butter, or sauces. When the grease sits on the walls for a long period, it becomes sticky and difficult to remove. But there are many ways to get rid of grease in your microwave with the help of common household tools. First of all, unplug the microwave if you want to clean the area near electrical parts, and do not spray cleaning liquid into any of its openings.
In case of light grease on the walls, you may use a soft cloth soaked in warm water and a little bit of mild dish soap. Gently clean the areas with grease, focusing mainly on the ceiling, side walls, and the floor of the microwave. If you have some grease that is rather hard, it can be dissolved by steam cleaning method. Put a microwave-safe bowl with water and 3-4 tablespoons of lemon juice inside your microwave and heat it for several minutes. Then wait a few minutes to let the steam dissolve the grease and wipe it with a clean cloth.
Be careful not to use abrasive cleaning agents and scrub pads since they will damage the inner wall of your microwave. In case of the stubborn grease, repeat the process of cleaning rather than rubbing hard. It is important to clean the grease spots right after the occurrence of stains.
Cleaning the Interior
Regular cleaning of the interior of your microwave removes food particles, grease, stains, and bad odors. First of all, be sure that the device is powered off and give it time to cool if it was just in use. Disassemble the turntable and other detachable parts to clean them separately under warm water with mild dish soap, rinse and dry them carefully.
To clean the interior, start with steaming the dried food and stains first. Put a microwave-safe bowl of water with some lemon juice or vinegar inside, turn the microwave on for several minutes and let it steam in there for a few minutes after stopping it to soften food particles and stains.
Clean the interior with a soft and damp cloth or sponge, focusing on the ceiling, walls, bottom, and areas close to the turntable. Take care especially of the corners as food particles may gather in there. In case of stubborn stains, gently rub them several times, but do not use aggressive cleaning tools. Do not spray any liquids inside the microwave through its openings and vents, as the moisture may get into its electric circuits and damage them.
When everything is done, clean the interior again with a new damp cloth and wipe the inside dry with a clean towel. You should keep it open to let it dry. Regular cleaning of the interior makes the maintenance of your microwave easy and comfortable.
Cleaning the Exterior
As much as interior cleaning is vital, cleaning the exterior of your microwave cannot be overlooked either. Over time, the exterior becomes marked by fingerprints, dust, grease, food splashes, and stains from daily use. This makes the appliance look dirty regardless of the fact that the interior is actually clean. Cleaning the exterior of your microwave will not only make it look nice, but also reduce chances of grease and dirt accumulating and making the task hard.
The microwave must be turned off and unplugged before you begin cleaning the exterior. Use a soft microfiber cloth or sponge wetted with warm water. Add mild dish soap to the water if there are greasy marks on the appliance. Carefully clean the exterior of the microwave, wiping the top, sides, front and any other surface that you can reach. Avoid soaking the cloth too much since excess water can find its way into electrical connections, vents, or button openings.
The door is the part of the microwave which is most likely to have fingerprints and food marks, especially if you have a young kid at home. Use a soft, damp cloth to clean the glass and surrounding frame, and then a dry cloth to wipe away streaks. If you have a microwave with a stainless-steel exterior, remember to rub in the direction of the metal grain to maintain its look. Be careful to avoid harsh abrasives, bleaches, steel wool, or cleaners which may damage or scratch the exterior of the microwave.
The control panel requires special care while being cleaned. Do not spray the cleaning solution on the control panel, but instead use it to wet a cloth and then clean the surface using the cloth. After cleaning is done, be sure to dry the exterior thoroughly using a dry cloth. Cleaning your microwave from the exterior once or twice a week can make it look fresh and clean.
What to Avoid
When cleaning a microwave oven, the primary issue is the use of the wrong accessories or procedures that damage the surface of the device. Firstly, do not spray water or liquid cleaning products in the microwave, especially near the control panel – a significant number of electrical appliances have short circuits due to moisture. Instead, it should be applied to a cloth with which you will remove food residues – this will help you get rid of stains and will not harm the technical characteristics of the microwave.
It is also definitely necessary to give up scrubbing the inside of the oven with steel wool, stiff scrubbers, or brushes. Such activities lead to the destruction of the coating, leaving unsightly scratches on the surface of the microwave. In addition, it is prohibited to use aggressive means of chemical cleaning, bleach, or oven cleaners. Even if the instructions say that it is safe to use, prefer household detergents, washing liquid, lemon, or baking soda. Do not try to remove dried stains with a knife or other sharp object since this may damage the surface of the microwave. Instead, it is recommended to use the method of steam cleaning and simply remove the softened food particles with a cloth.
Finally, do not attempt to clean a hot microwave after cooking – there is a risk of burns from the remaining food. It should also be noted that excess water should not be poured into the microwave after cleaning – after moistening the inside of the device, it will be necessary to dry it with a cloth. The same advice applies to the door, control panel, and vents – a large amount of liquid there can cause a short circuit. However, if the user is faced with the need to clean a microwave oven, the above rules will help him get rid of dirt without damaging the device.
Don’t miss this related post:
8 Energy-Saving Tips for Kitchen Appliances
Home Safety: 9 Essential Tips Every Family Should Know
House: How to Clean Your House Quickly – 7 Proven Tips
Home: How to Remove Bad Smells from Your Home – 7 Proven Tips
Home: How to Remove Bad Smells from Your Home – 7 Proven Tips
Conclusion
It does not have to be challenging to clean your microwave oven regularly. By following some simple tips, you will be able to remove food stains and smells, grease, and food splashes with ease. You may use some simple homemade ways to soften dried food using only water and lemon juice or white vinegar and then wipe the interior surfaces of the device. You should also think about wiping the microwave turntable using warm water and dish soap solution.
You also have to give your microwave a proper exterior cleaning. Wiping the door, control panel, sides, and top of the device can eliminate fingerprints, dirt, and grease on its surfaces. You should use soft cloths and sponges only to avoid damaging the device. Also, do not use aggressive chemicals or abrasive materials and do not put too much water inside the microwave during the cleaning process.
By including microwave cleaning into your weekly kitchen routine, you will be able to save yourself time later. Quick wipes after spills will help you prevent the appearance of difficult stains, and more thorough cleaning will ensure that your device remains fresh all the time. Just remember to read your microwave cleaning guidelines provided by the manufacturer and clean it carefully around electrical parts of the device.